(WIP)ProfWhiz
Synopsis: Notes on ProfWhiz. Should turn into a larger document outlining steps required for bulk deployment.
Published October 23rd, 2025
Last Modified: September 17th, 2026
Intro: ProfWhiz is a profile migration tool. Migrate a local user profile to an Azure AD user profile, or another Domain, on the same Windows computer. Multiple editions exist, which perform different capabilities at scale.
Published October 23rd, 2025
Last Modified: September 17th, 2026
Intro: ProfWhiz is a profile migration tool. Migrate a local user profile to an Azure AD user profile, or another Domain, on the same Windows computer. Multiple editions exist, which perform different capabilities at scale.
Quick Run Down
-
1.) Install ProfWhiz Development Kit
2.) Creating the ProfWhiz configuration
3.) Migrating the Profile - Manually - User Appointment
4.) Troubleshooting
Procurement & Install
ProfWhiz Config - Professional Edition and Corporate - AzureAD Export
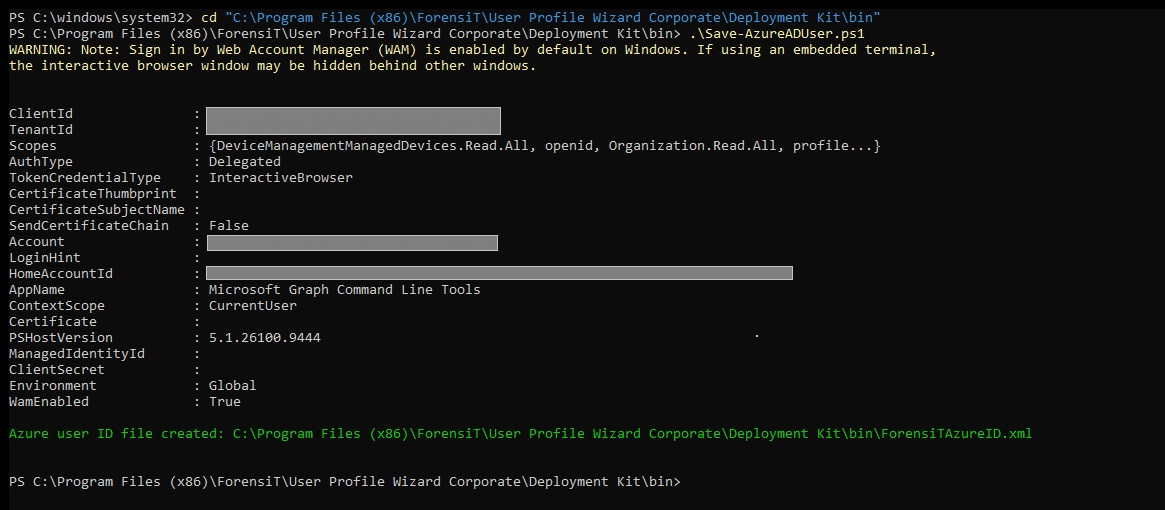
- Run the 'Save-AzureAdUser.ps1' against the client tenant - Default Install location: C:\Program Files (x86)\ForensiT\User Profile Wizard Corporate\Deployment Kit\Bin
- Note the "Save-AzureADUser.ps1" is only installed with the Corporate and Professional Editions. It can still be downloaded from the ForensiT GitHub Account.
- Addition instructions available in the 'Generating a ForensiTAzureID.xml file' (page 70) segment of the ProfWhiz Corporate Guide.
- The output of this script will need to be referenced by the Deployment Kit.
Example Command Line;
CMD: cd "C:\Program Files (x86)\ForensiT\User Profile Wizard Corporate\Deployment Kit\Bin"

                CMD: .\Save-AzureAdUser.ps1
ProfWhiz Config - Professional Edition and Corporate - AzureAD Provisioning Package
- Start with reading 'Creating a Provisioning Package ' (page 72) segment of the ProfWhiz Corporate Guide.
- Downloaded Windows Configuration Designer from the Windows Store
- Started from the Provision Desktop Devices Wizard
- I ran into an issue with the wizard. See the troubleshooting notes at the end if stuff doesn't load / open.
- Run the 'Save-AzureAdUser.ps1' against the client tenant - Default Install location: C:\Program Files (x86)\ForensiT\User Profile Wizard Corporate\Deployment Kit\Bin
- Note the "Save-AzureADUser.ps1" is only installed with the Corporate and Professional Editions. It can still be downloaded from the ForensiT GitHub Account.
- Addition instructions available in the 'Generating a ForensiTAzureID.xml file' (page 80) segment of the ProfWhiz Corporate Guide.
- The output of this script will need to be referenced by the Deployment Kit.
Example Command Line;
CMD: cd "C:\Program Files (x86)\ForensiT\User Profile Wizard Corporate\Deployment Kit\Bin"

                CMD: .\Save-AzureAdUser.ps1
ProfWhiz Config - Running the Utility, for Azure AD Migrations
-
Start the Profwiz User Profile Wizard Deployment Kit. It should be available in the start menu after install.
- Create and name a new project for the client
- Enter the domain name and CHECK the 'Azure AD' box
- Azure ID file path: Select the xml file created in the previous step
- Migrating from an existing domain: No
- Deselect ‘User lookup file’ (this is optional and not required for single user transfers) – see Profwiz support docs for more info
- Continue to save the new .config file
- Modify the .config file to use local file paths for .xml file
- Modify the .config file to include the proper license information
Migrating the Profile - User Appointment Manual
-
Prep End User Machine
- Create tempAdmin account for the migration
- Stage the ProfWhiz file package in the C:/ drive
- Sign in as the temp admin account.
- If required, leave the domain. 'ENTRA' can be used as the workgroup to help differentiate between completed machines and 'WORKGROUP' machines in RMM.
- Sign in as the temp admin account.
- Join Entra AD with the previously created DEM account.
- Select Connect.
- Select 'Join this device to Microsoft Entra AD' (at the bottom of the window).
- Sign in with the DEM account.
- Run the imported profwhiz.exe.
- Launch Regedit.exe
- Navigate to:Computer Configuration > Administrative Templates > Windows Components > Internet Explorer > Internet Control Panel > Security Page (or Security Zones).
- Locate the setting "Security Zones: Use only machine settings".
- Set it to '0' - Disabled.
- Restart the Configuration Designer. Worked Immediately.
- Post Migration - Default File Associations EVERYTHING is totally Broken:
- Clearing Profile MetaData to create a new Profile.
Entra AD Join
CMD: start ms-settings:workplace Troubleshooting Tips
-
Windows Configuration Designer Wizards don't load:
Yep it does that. Apparently. This fixed it on my machine:
Unable to set default apps :